Painting a ceiling is one of those jobs that looks simple but is more technical than most homeowners expect. Applied incorrectly, ceiling paint shows every roller mark, every edge lap, and every paint holiday (missed spot) — often more visibly than on walls because ceilings are viewed in raking light. Professional ceiling painting in Melbourne costs $200–$600 per room depending on ceiling height, size, and condition. This guide explains what’s involved, what affects pricing, and how to handle the most common ceiling problems.
Ceiling Painting Cost Melbourne: Quick Answer
Professional ceiling painting in Melbourne costs $200–$350 for a standard bedroom and $350–$600 for a larger living room. These prices include preparation, one or two coats of quality ceiling paint, and cutting in around cornices. High ceilings (above 3m) and rooms with complex cornices add to the cost.
Ceiling Painting Prices Melbourne: By Room Type
The table below shows indicative 2026 Melbourne ceiling painting prices by room type. All prices are for ceiling only (labour, preparation, and paint). Prices assume rooms in reasonable condition; water-stained, cracked, or plaster-damaged ceilings are quoted separately.
| Room | Ceiling Height | Cost (ceiling only) |
|---|---|---|
| Bedroom | 2.4m | $200–$350 |
| Living room | 2.4m | $350–$550 |
| Open plan living/dining | 2.4m | $500–$800 |
| Heritage room | 3.0–3.5m | $400–$700 |
| Heritage room with ornate cornice | 3.0–3.5m | $500–$900 |
| Any room with scaffolding required | 3.5m+ | add $300–$600 |
Prices are labour only for standard repaints. Repairs to water-stained, cracked, or plaster-damaged ceilings are quoted separately.
What Affects the Cost of Ceiling Painting?
Room size is only one part of the equation. Five factors consistently drive ceiling painting costs up or down in Melbourne.
Ceiling height
Standard 2.4m ceilings can be painted from a platform ladder — this is the baseline for most Melbourne homes built from the 1970s onward. Ceilings at 3m, common in heritage inner-city properties, require extension equipment and more time to set up and reposition. Above 3.5m, scaffolding or elevated work platforms are typically required, adding significantly to both cost and setup time. A room that would take a half-day at standard height can take a full day when scaffolding is needed.
Ornate cornices and ceiling roses
Heritage Melbourne homes — particularly in Fitzroy, Carlton, South Yarra, Hawthorn, and surrounding inner suburbs — often have decorative plaster cornices and ceiling roses that require careful cutting-in with a brush. This takes three to four times longer than cutting in against a plain, flat cornice edge. If the cornice profile is deep or complex, a skilled painter will spend the majority of the job on the edges alone before the field is even rolled.
Surface condition
A ceiling in good condition accepts topcoat quickly. Water stains must be sealed with a stain-blocking primer — such as Dulux Aquanamel or an equivalent product — before the topcoat is applied. Without this sealing step, stains bleed through even multiple coats of paint. Heavily patched ceilings, ceilings with old texture coatings, or ceilings with multiple layers of chalky old paint all require additional preparation time and are priced accordingly.
Number of coats
Most ceilings require two coats of ceiling paint for a consistent, even finish. A single coat is rarely sufficient — particularly on older plaster ceilings that have not been painted in several years. Badly stained or heavily repaired ceilings may need three coats to achieve a uniform result: one coat of stain-blocking primer plus two topcoats. Each additional coat adds time and product cost.
Combined with wall painting
Ceiling painting as part of a full room repaint is proportionally cheaper than a standalone ceiling-only job. When a painter is already on-site with the room cleared, drop sheets laid, and scaffolding (if needed) already in place, adding the ceiling is efficient. Booking ceiling-only work as a standalone job incurs the same mobilisation costs as a full room job — spread across a smaller scope.
How to Paint a Ceiling: The Professional Approach
Ceiling painting follows a clear sequence. Skipping or rushing any of these steps is where amateur results come from — visible roller marks, patchy coverage, and stains bleeding back through the topcoat.
Step 1: Protect the room
Drop sheets go down on the floor before anything else. Furniture is moved to the centre of the room and covered with plastic sheeting. If painting the ceiling only (not the walls), the tops of walls and any cornices or coving get masked with painter’s tape. Power points and light fittings are masked or removed.
Step 2: Clean the ceiling
Dust, cobwebs, and loose debris are wiped down with a dry cloth or a brush. Any visible stains — from water, grease, or nicotine — are wiped over with a sugar soap solution and allowed to dry fully before the next step. Painting over a dusty or greasy ceiling creates adhesion failure and uneven absorption.
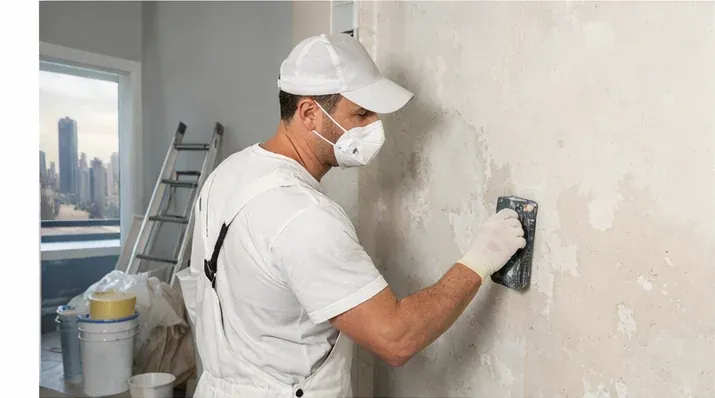
Step 3: Repairs
Hairline cracks are filled with a flexible filler suitable for plaster — rigid filler in an old Melbourne home with seasonal movement will simply crack again. The filler is allowed to dry completely, then sanded smooth with fine-grit paper. Larger holes or impact damage require a two-stage fill: first fill to bring the surface to near-flush, then a skim coat for a flush finish. The repaired areas must be primed before topcoat to prevent differential sheen.
Step 4: Seal stains
Any water stains or nicotine stains must be sealed with a dedicated stain-blocking product — Dulux Aquanamel for water stains, or a shellac-based stain blocker (such as Zinsser B-I-N) for heavy nicotine. This is a non-negotiable step. Applying topcoat directly over an unprimed water stain guarantees the stain will reappear through the finished coat. Allow the sealer to dry fully before proceeding.
Step 5: Cut in around the edges
The line where the ceiling meets the wall or cornice is painted first with a quality brush — a steady hand and a loaded brush, not overloaded, pulled at a consistent angle. This edge work defines the quality of the finished ceiling. Rushed or wavering cut-in is visible from across the room, especially in rooms with good natural light.
Step 6: Roll the field
A ceiling-specific low-nap roller (6mm or 10mm nap for smooth to lightly textured ceilings) is used to roll the main ceiling area. The roller is worked in a consistent direction — typically away from the primary light source — and applied in overlapping W-patterns or parallel passes with wet-edge technique to avoid lap marks. The key is a roller that is loaded but not overloaded. Too much paint leads to drips and ridges; too little leads to dry, patchy coverage.
Step 7: Second coat
After adequate dry time — typically 2–4 hours for water-based ceiling paint under normal Melbourne conditions — a second coat is applied using the same technique. The second coat locks in coverage and eliminates any thin spots or slight roller texture from the first pass.
Key takeaway
The biggest ceiling painting mistake is overloading the roller. A roller with too much paint drips and leaves ridges. Use a dry-ish roller and multiple passes rather than one heavy coat. This is the single most consistent difference between professional and amateur ceiling results.
Flat vs Low-Sheen Ceiling Paint: Which Is Better?
The paint finish you choose for a ceiling affects both the look and the long-term performance of the surface. There are three realistic options for most Melbourne homes.
Flat white
Flat white is the standard for most ceilings in living rooms, bedrooms, and hallways. It reflects light diffusely, which hides surface imperfections — roller texture, small repairs, and minor undulations — far better than any other finish. Dulux Ceiling White is Australia’s most widely used ceiling paint and performs reliably on both new plaster and previously painted surfaces. The downside: flat paint is not washable. Any mark on a flat ceiling is effectively permanent without a touch-up.
Low-sheen
Low-sheen ceiling paint has a subtle sheen that makes it more resistant to moisture and easier to wipe clean. This makes it the better choice in kitchens, bathrooms, laundries, and children’s rooms where ceilings encounter steam, splashes, or sticky handprints. The trade-off is that low-sheen shows surface imperfections more readily than flat — any minor sag in the plaster or roller ridge catches the light more visibly.
Satin and semi-gloss
Satin and semi-gloss finishes are rarely used on ceilings and only as a deliberate design choice — for instance, a feature ceiling in a contemporary interior. These finishes show every surface flaw, every repair, and every minor imperfection. Unless the ceiling surface is perfectly flat and smooth, the result is often worse than flat or low-sheen. They are best left to walls and trim.
Recommendation: Use flat white for living rooms, bedrooms, and hallways. Use low-sheen for kitchens, bathrooms, and laundries. Both are available in standard white — the most common ceiling colour in Melbourne homes.
Dealing With Common Ceiling Problems
Melbourne homes — particularly those built before 1980 — present a consistent set of ceiling challenges. Here is how each one is correctly handled.
Water stains
Water stains are the most common ceiling problem in Melbourne homes, typically caused by a roof leak, an overflowing bath or shower above, or a leaking pipe. The critical rule: identify and fix the source of the leak before painting. Painting over an active leak will produce a new stain within weeks. Once the leak is repaired and the ceiling has dried fully (allow at least two weeks), seal the stain with a stain-blocking primer before applying topcoat. Two coats of standard ceiling paint applied directly over a water stain will not cover it — the tannins in the stain bleed through paint regardless of how many coats are applied.
Cracks
Hairline cracks in plaster ceilings are normal in Melbourne’s older homes and are caused by a combination of foundation movement, temperature cycling, and the natural aging of plaster. These are cosmetic and straightforward to repair — fill with flexible filler, sand, prime, and repaint. Large cracks, recurring cracks, or cracks that follow a diagonal path across the ceiling may indicate structural movement in the building frame or footings. If you have cracks of this type, get a structural assessment before spending money on a paint finish that may crack again within months.
Peeling paint
Peeling paint on ceilings is typically caused by one of three things: moisture migration from above, an incompatible paint system (for example, a water-based paint applied directly over an old oil-based ceiling without correct priming), or paint applied over a dirty or glossy surface that prevented adhesion. The correct fix is to scrape all loose paint, lightly sand the edges of any remaining paint to feather them back, seal the surface with an appropriate primer, and then repaint. Simply rolling new paint over peeling paint delays the problem by one paint cycle at best.
Mould and mildew
Mould on ceilings is common in Melbourne bathrooms, laundries, and kitchens with inadequate ventilation. It must be treated before painting — not painted over. Wash the affected area with a diluted bleach solution (1 part bleach to 4 parts water), allow the surface to dry completely, then apply a mould-resistant ceiling paint such as Dulux Wash & Wear or an equivalent mould-resistant product. Painting over untreated mould with standard ceiling paint results in mould growth through the new paint within weeks. For persistent mould problems, improving ventilation is the only long-term fix.
Smoke and nicotine staining
Heavy nicotine staining from years of indoor smoking is one of the most persistent ceiling problems and cannot be addressed with standard water-based primers or ceiling paints. Shellac-based primer — Zinsser BIN is the industry standard — is the only reliable sealer for heavy nicotine. Water-based stain blockers and water-based primers will not prevent nicotine from bleeding through. Apply one or two coats of shellac-based primer, allow to dry fully, and then apply two coats of quality flat white ceiling paint. The shellac has a strong odour during application — ensure the room is well-ventilated.
Why Modernize Solutions for Ceiling Painting in Melbourne
Modernize Solutions is Melbourne’s choice for ceiling painting because we handle the issues most painters skip — water stain sealing, crack repair, heritage cornice cutting, and mould treatment — before a single drop of topcoat goes on. We use Dulux Ceiling White and premium interior systems, provide fixed-price quotes, and carry $20M public liability insurance. With 30+ years of experience across 1,000+ Melbourne homes, rated 4.8 stars on Google (154 reviews), and a commitment to clean, consistent results, we deliver ceilings built to last. Call 0451 040 396 for a free, no-obligation ceiling painting quote.
Ceiling Painting vs Full Room Painting: Should You Do Both at Once?
In most cases, yes. If you are already having a room painted, adding the ceiling is cost-efficient because the room is already cleared, drop sheets are already down, and the painter is on-site. Painting just the ceiling of a room with dated or discoloured wall paint often makes the contrast more obvious — a bright new ceiling against tired walls can look worse than before. Doing both ceiling and walls together in a single visit typically costs 20–30% less than two separate mobilisations, and the finished result is consistent throughout the room.
For a full breakdown of room painting costs including walls and trim, see our guide to cost to paint a room in Melbourne. For general interior painting or a full residential painting quote, Modernize Solutions provides fixed-price assessments across Melbourne.
Frequently Asked Questions
How much does ceiling painting cost in Melbourne?
Professional ceiling painting in Melbourne costs $200–$350 for a standard bedroom and $350–$600 for a larger living room. These prices include preparation, one or two coats of quality ceiling paint, and cutting in around cornices. High ceilings above 3m and rooms with ornate heritage cornices add to the cost. Scaffolding for ceilings above 3.5m adds a further $300–$600 to the job.
How many coats of paint does a ceiling need?
Most ceilings require two coats of ceiling paint. A single coat is rarely sufficient for an even, consistent finish. Badly stained, heavily repaired, or previously dark-coloured ceilings may require three coats — particularly if a stain-blocking primer has been applied as a first layer. Always allow adequate dry time between coats: 2–4 hours for water-based ceiling paint under normal Melbourne conditions.
Can you paint over a water-stained ceiling?
Not directly. A water stain must be sealed with a stain-blocking primer — such as Dulux Aquanamel or a shellac-based product like Zinsser BIN — before any topcoat is applied. Applying two or more coats of standard ceiling paint directly over a water stain will not hide it; the stain will continue to bleed through the finished surface. The source of the water leak must also be identified and repaired before painting, otherwise the stain will return.
What type of paint is best for ceilings?
Flat white ceiling paint is the standard choice for most rooms. It hides surface imperfections well and gives a clean, diffuse finish in natural and artificial light. Dulux Ceiling White is Australia’s most widely used ceiling paint. For kitchens, bathrooms, and laundries, a low-sheen ceiling paint is preferable because it is more resistant to moisture and easier to wipe down. Satin and semi-gloss finishes are not recommended for ceilings unless the surface is perfectly smooth.
How long does ceiling painting take to dry?
Water-based ceiling paint is typically touch-dry within 1–2 hours and ready for a second coat after 2–4 hours under normal Melbourne conditions (20–25°C, moderate humidity). A freshly painted ceiling should be left undisturbed overnight before the room is fully back in use. High humidity — common in Melbourne’s summer months — can extend dry times. Oil-based sealers and shellac primers take longer to cure and should be allowed to dry overnight before topcoat.
Related Service: Ceiling Painting
Brighten your rooms with flawless ceiling painting and repair.
Learn more about our Ceiling Painting service →Modernize Solutions
Melbourne's most experienced residential painters since 1987.