Last updated: 15 July 2026
DIY painting in Melbourne costs $1,500–$3,000 in materials for a full 3-bedroom interior, but takes 60–100 hours of labour spread over 6–10 weekends. Professional painting costs $6,000–$11,000 for the same scope but is completed in 3–5 working days with a superior finish. The right choice depends on the scope, the stakes, and how much value a homeowner places on their own time.
For some jobs, DIY painting makes sense. For most, it does not. If you can save money doing it yourself and get a result you are happy with, you should. But the decision needs real numbers and realistic expectations, not a YouTube video that makes it look easy. Here is how to decide whether to paint it yourself or hire a painter.
What is the real cost of DIY vs professional painting?
DIY painting materials cost $1,500–$3,000 for a 3-bedroom interior, but when you factor in 60–100 hours of your own labour at $40–$60 per hour, the true cost gap between DIY and professional painting shrinks to just 30–50%.
This is the question everyone starts with, and it is where the biggest misconceptions live. DIY painting is cheaper in materials, but most people forget to account for the tools they need to buy and the value of their own time. A professional quote includes everything, labour, materials, equipment, preparation, and clean-up.
The table below compares the real cost of painting a standard 3-bedroom house interior (walls, ceilings, and trim throughout) in Melbourne in 2026.
| Cost Item | DIY | Professional |
|---|---|---|
| Paint (premium, e.g. Dulux Wash&Wear) | $800–$1,200 | Included |
| Primer | $150–$250 | Included |
| Brushes, rollers, trays, tape, drop sheets | $250–$400 | Included |
| Filler, sandpaper, sugar soap, clean-up | $80–$150 | Included |
| Ladder / step platform | $120–$300 | Included |
| Your time (60–100 hrs at $40/hr) | $2,400–$4,000 | Included |
| Total | $3,800–$6,300 | $6,000–$11,000 |
Yes, professional painting costs more, but the gap shrinks significantly when you value your own time at even a modest hourly rate. If you earn $60/hr in your day job, the DIY cost climbs to $5,200–$8,300. And the professional result is better. The real question is not just “how much will I save?” but “how much is my time worth, and will I be happy with what I produce?”
Key takeaway: When a Melbourne homeowner values their time at $40–$60 per hour, the true cost gap between DIY and professional painting shrinks to 30–50%, and the professional result lasts significantly longer.
For detailed professional pricing, see our house painting cost guide for Melbourne.
Is it cheaper to paint yourself or hire a painter?
Painting yourself is cheaper on paper: $1,500–$3,000 in materials for a 3-bedroom interior against $6,000–$11,000 for a professional job. But once you value your own 60–100 hours at even $40 an hour, the real DIY cost climbs to $3,800–$6,300 and the gap all but closes. For a single room the maths is closer still, and small jobs are where DIY genuinely saves money.
| DIY | Professional | |
|---|---|---|
| Materials and tools (3-bed interior) | $1,500–$3,000 | Included |
| Your time (60–100 hrs at $40/hr) | $2,400–$4,000 | Included |
| Realistic total | $3,800–$6,300 | $6,000–$11,000 |
| Time to finish | 6–10 weekends | 3–5 working days |
| Finish | Depends on your skill | Two coats, even coverage |
DIY wins on a single room, an accent wall, or a shed where the cost is mostly paint and a couple of rollers. A professional wins on a full-house interior painting repaint, where your time, the tools you buy once, and the cost of fixing mistakes wipe out most of the saving. If a botched job needs correcting, expect to pay 20–30% more than a straight repaint would have cost.
How much does it cost to hire a painter in Melbourne?
Hiring a painter costs around $650–$950 for a standard bedroom, $6,000–$11,000 for a full 3-bedroom interior, and $10,000–$18,000 for a single-storey exterior repaint, at 2026 Melbourne rates. Most reputable Melbourne painters quote a fixed price for a defined scope rather than an hourly rate, which protects you from blowouts and makes quotes comparable. The quote should include preparation, two coats, premium paint or a paint allowance, protection of floors and furniture, and clean-up. Room-by-room pricing is broken down in our cost to paint a room guide, and whole-house numbers in the house painting cost guide.
How do you hire the right painter?
Compare itemised written quotes, not headline prices. Victoria does not licence painters the way it does plumbers or electricians, so the paperwork that matters is different:
- An itemised scope: preparation level, number of coats, exact products, what is excluded. A $2,000 gap between quotes is usually a preparation gap.
- Public liability insurance: ask for the certificate. It protects your property, not just the painter.
- A fixed price, not an hourly estimate, with any provisional items (rot repair, extensive cracking) flagged upfront.
- Recent local work you can see, or reviews naming the suburb and job type.
- Wariness of any deposit demand above 10–20% before materials are on site.
A cheap professional quote can fail the same way a rushed DIY job does, the corners just get cut on someone else’s clock.
How much longer does DIY painting take than professional?
This is where the DIY vs professional comparison gets honest. A professional painting crew of 2–3 painters will complete a full 3-bedroom interior in 3–5 working days. You go to work Monday, you come home Friday, it is done.
A first-time DIY painter working weekends only should realistically allow 6–10 weekends. That is 2–3 months of disrupted living, furniture shifted, drop sheets down, rooms out of commission, paint fumes, and the constant mental load of an unfinished project hanging over you.
Why the time difference is so large:
- Professional painters cut in a room in 20–30 minutes. A beginner takes 1–2 hours.
- Professionals roll a ceiling in one pass. A beginner does three passes and still sees lines.
- Preparation, filling, sanding, priming, is methodical and fast for someone who does it every day. For a first-timer, it takes twice as long and still gets missed in spots.
- Professionals do not need to stop and watch a tutorial before each step.
The time factor is the most underestimated part of DIY painting. I have had clients call me mid-project, three weekends in, asking us to finish the job because they did not realise how long it would take. For a full breakdown of professional timeframes, see our guide to how long it takes to paint a house in Melbourne.
What quality difference can you actually see between DIY and professional?
Walk into a room painted by a professional and a room painted by a first-time DIYer, and you will see the difference within five seconds. It is not one thing, it is everything adding up.
Preparation is the single biggest difference
A professional painter spends 60–70% of their time on preparation before a roller touches the wall. That means filling every nail hole and crack, sanding the filler flush, spot-priming bare patches and repairs, sanding gloss surfaces for adhesion, cleaning dust and cobwebs, and masking everything that should not be painted. Most DIY painters spend about 10% of their time on preparation, and it shows in the finished result. Read our wall preparation guide if you want to do this step properly.
Cutting in
The clean, sharp line where wall meets ceiling, where wall meets trim, where colour meets colour, that is cutting in, and it is a skill that takes years to develop. Professional painters use an angled brush loaded to the right level and cut a straight line freehand, quickly and consistently. Tape helps, but even tape requires skill, it needs to be applied perfectly straight, pressed firmly to prevent bleed, and removed at the right time. Poor cutting in is the most visible flaw in amateur paint work.
Rolling technique
There is a right way to load a roller, a right amount of pressure, and a right pattern to work the paint onto the wall. Using the wrong roller nap for your surface produces visible texture. Overloading creates drips and orange-peel. Underloading creates dry patches and roller tracks. Professionals maintain a wet edge across the full wall so there are no lap marks, this is harder than it sounds in a large room.
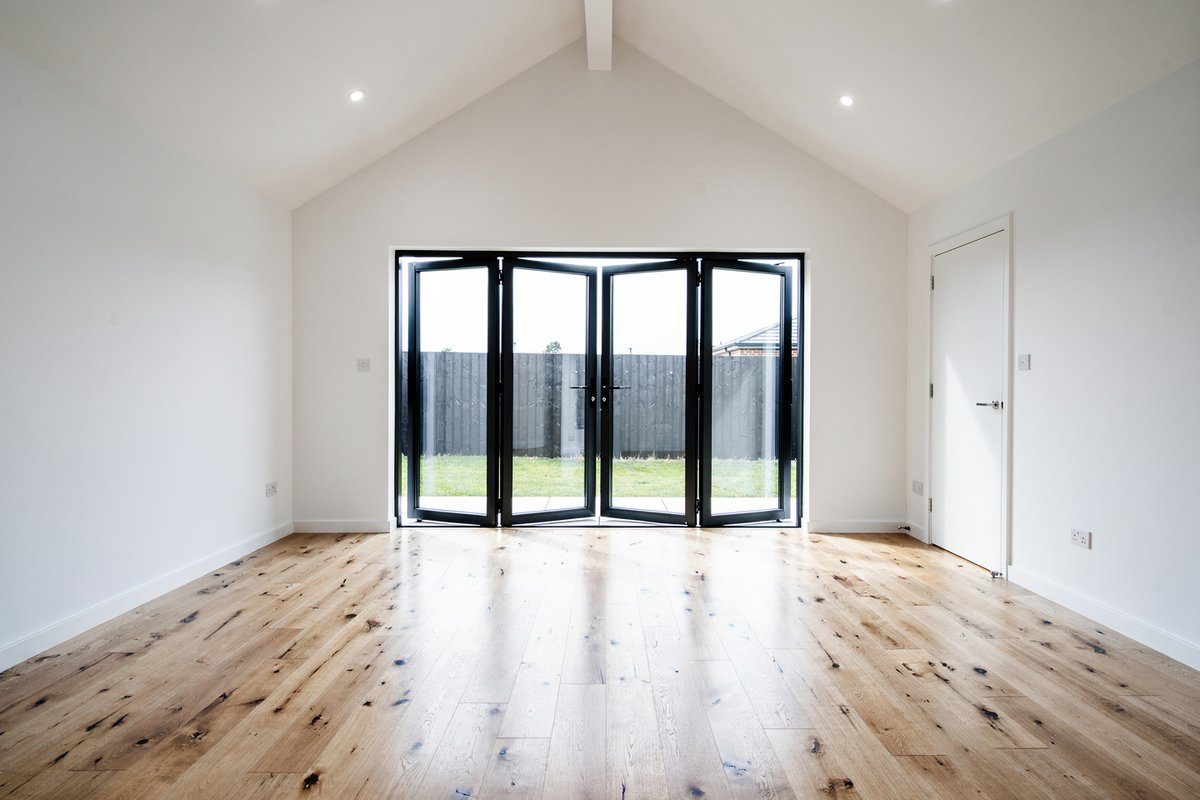
A professionally painted living room. The difference is in the details, consistent coverage, clean lines at the ceiling junction, and no visible roller marks or lap lines.
What are the 5 most expensive DIY painting mistakes?
These are the mistakes I see most often when clients call us to fix a DIY job that did not go to plan. Every one of them costs more to correct than it would have cost to do it right the first time.
1. Skipping surface preparation
Cost to fix: $200–$500 extra per room. Paint applied over dusty, greasy, or unsanded surfaces will peel, bubble, or flake within months. The entire surface has to be sanded back, cleaned, primed, and repainted. This is the most common and most expensive DIY mistake.
2. Using cheap paint
Cost to fix: 1–2 extra coats per surface. Budget paint from Bunnings at $30–$40 per 4L has lower resin and pigment content than premium products like Dulux Wash&Wear. It covers poorly, requires 3–4 coats instead of 2, and does not wash or wear as well. You spend more in time and paint than you save on the cheaper product.
3. Bad cutting in and paint on ceilings or trim
Cost to fix: $150–$300 per room. Once paint bleeds under tape or a shaky hand puts wall colour on the ceiling, a professional has to carefully repaint the affected ceiling or trim edges. In some cases, the entire ceiling needs a fresh coat to blend the touch-ups.
4. Painting in wrong conditions
Cost to fix: full repaint. Melbourne’s weather is variable, painting when it is too cold (below 10°C), too hot (above 35°C), or too humid causes adhesion failure, slow curing, and surface defects. If the paint has not bonded to the surface, it has to come off and the job starts again. WorkSafe Victoria also advises against working on ladders in windy conditions for exterior work.
5. Wrong roller nap for the surface
Cost to fix: sanding and recoating. A long-nap roller on a smooth wall leaves heavy stipple texture that looks like orange peel. A short-nap roller on a textured surface misses the valleys and produces patchy coverage. Choosing the right roller is straightforward once you know the rules, see our paint roller guide for the full breakdown.
Fixing a botched DIY job professionally costs 20–30% more than doing it right the first time because the painter has to sand back, correct, and then repaint over the existing work.
Key takeaway: The five most expensive DIY painting mistakes, skipping preparation, using cheap paint, poor cutting in, wrong conditions, and wrong roller nap, all relate to technique and product knowledge rather than physical effort, which is why professional painters avoid them consistently.
When does DIY painting actually make sense?
I am not going to pretend that every painting job needs a professional. Here are the situations where doing it yourself is a reasonable choice:
- A single accent wall in a bedroom. One wall, one colour, minimal cutting in. Low risk, high satisfaction. A weekend project that most people can handle well.
- A small bedroom touch-up. If the existing paint is in good condition and you are recoating in the same colour, a single room is manageable. Buy quality paint, use a decent roller, and take your time with preparation.
- A garden fence or back deck. Exterior timber staining and fence painting is forgiving work. The surface does not need to be perfect, and minor imperfections are not visible at a distance. Grab a good brush and a tin of Dulux Weathershield or exterior timber stain.
- A garage or shed interior. Low expectations, no visitors, no stress. Practice your technique here before touching the living room.
- Touch-ups between full repaints. Scuff marks, small nail holes, and minor wall damage can be spot-fixed with leftover paint and a small brush.
The common thread: small scope, low stakes, and surfaces where imperfections are less visible or less important.
Which paints are hardest to apply yourself?
Two-pack enamels, gloss enamels and low-sheen acrylics in dark colours are the paints where DIY results visibly fall short. They show every lap mark, brush stroke and patch of uneven film thickness, especially under side light from a window.
Low-sheen walls are the classic trap: the paint looks fine as you roll it, then dries with “flashing”, patchy sheen differences where wet edges overlapped or the roller was reloaded unevenly. Dark and bold colours make it worse because pigment concentration shows every inconsistency. Gloss and semi-gloss enamels on doors and trim need to be laid off with a near-empty brush at the right moment or they hold brush marks permanently. Two-pack epoxy and polyurethane systems add a hard time limit: once mixed, the pot life is fixed, and a slow amateur ends up applying paint that has already started curing. If your project involves any of these, the quality gap between DIY and professional is at its widest.
When should you always hire a professional painter?
Some jobs are not worth the risk, the time, or the frustration of doing yourself, even if you are handy.
- Full house repaints (interior or exterior). The scale makes DIY impractical for most people. A professional crew finishes in days, not months.
- Exterior painting. Working at height on ladders is dangerous. Weather timing is critical. Surface preparation on weatherboard, render, or timber is specialised work. Our weatherboard repainting guide explains why.
- Two-storey homes. Scaffolding, height safety, and the physical demands of painting at elevation put this firmly in professional territory. WorkSafe Victoria has strict requirements for working at height.
- Ceilings. Ceilings are the hardest surface to paint well. Light rakes across them and exposes every imperfection. Even experienced DIYers struggle with ceilings, see our ceiling painting guide for why.
- Heritage and period homes. Ornate cornices, ceiling roses, decorative timber, these require careful brush work and often lead paint management. Our heritage house painting guide covers what is involved.
- Pre-sale painting. If you are painting to sell your home, the finish needs to be flawless. Buyers notice poor paint work, and it affects their perception of the entire property. See our pre-sale painting guide.
- Colour changes from dark to light. These require extra coats, tinted primers, and careful technique to avoid bleed-through.
Once you have decided to hire rather than DIY, the quote you accept matters just as much as the decision itself, see the hiring checklist earlier in this guide for what separates a quote that lasts from one that does not.
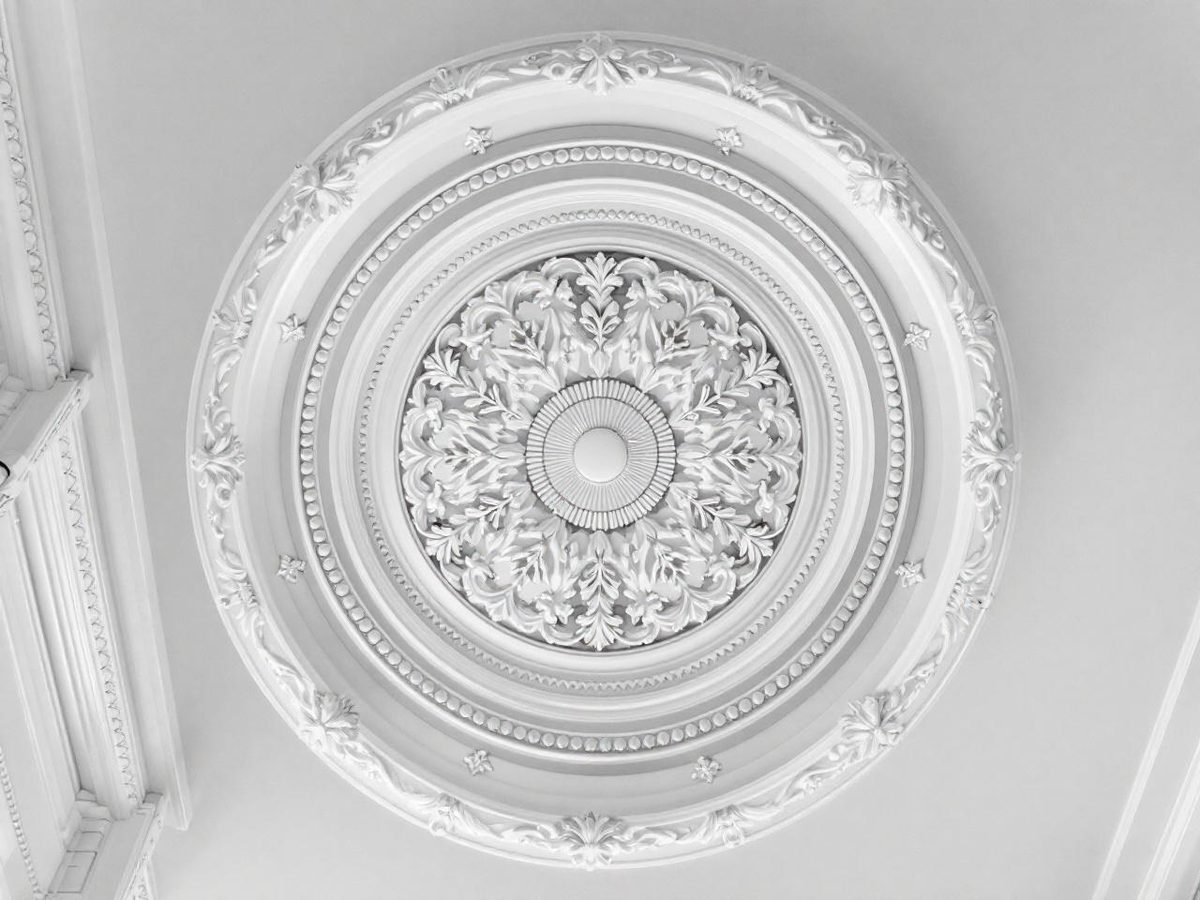
Ceiling detail around an ornate ceiling rose. This level of precision around heritage plasterwork is where professional skill is most visible, and most valuable.
What are the hidden costs of DIY painting?
The materials list is the obvious cost. Here are the costs that most people do not factor in until they are already committed:
Tools you buy once and never use again. A quality ladder ($150–$300), extension poles ($40–$60), multiple roller frames ($15–$25 each), specialty brushes ($20–$40 each). Most of these end up in the garage after one use. Professional painters amortise their equipment over thousands of jobs, you are absorbing the full cost for one project.
Wasted paint. First-time painters consistently buy too much of some colours and not enough of others. An opened 4L tin of Dulux Wash&Wear at $70–$90 cannot be returned. Leftover paint that sits in the shed for two years and goes off is money wasted.
Time spent learning. YouTube tutorials are helpful, but they do not replace experience. The hours spent watching videos, reading product data sheets, and figuring out which primer to use add up. A professional already knows.
The second trip to Bunnings. It is a running joke among DIYers for a reason. You will forget something. You will run out of tape. You will need a different roller nap. Each trip is an hour of your weekend gone. Bunnings has everything you need, you just will not know what you need until you are mid-job.
Physical cost. A full day of painting is hard physical work, overhead ceiling work especially. Sore shoulders, aching back, stiff knees from crouching to cut in along skirting boards. Professional painters are conditioned for it. If you work a desk job Monday to Friday, a full weekend of painting will be felt all week.
The cost of living in a construction zone. Furniture moved, rooms unusable, drop sheets everywhere, paint fumes. For a professional job, this lasts 3–5 days. For a weekend DIY project, it lasts 2–3 months.
The bottom line: DIY earns its keep on small, low-stakes scopes where the cost really is just paint and a weekend. Everywhere else, the honest maths, your hours, single-use tools, and the price of fixing mistakes, closes most of the gap, and the professional finish lasts years longer.
Rather have a professional handle it?
Free on-site inspection and a fixed-price written quote, no obligation. Painting Melbourne homes since 1987.
Related service: Interior painting.
We paint across Preston, Sunbury, Tarneit, Pascoe Vale, Albion, Ardeer and more, see our painting services in Footscray, or the house painters in Melbourne families have trusted since 1987.